How to Organize a Small Apartment: A Step-by-Step Guide
A compact home can become difficult to manage when several activities, belongings, and storage needs compete for the same limited space. Learning how to organize a small apartment is easier when you stop treating the entire home as one giant project and work through small, manageable areas you can finish instead.
You do not need to empty every closet, buy a set of matching containers, or reorganize the whole apartment in one weekend. A more practical approach is to identify where everyday routines become frustrating, choose one manageable area, sort only the belongings in that area, give the remaining items sensible homes, and test whether the new arrangement is actually easier to use.
This guide gives you a clear start-to-finish sequence you can repeat throughout the apartment without turning your home into an ongoing sorting zone.
If you want a broader overview of how apartment spaces, storage limitations, and daily routines fit together, explore our Small Apartment Organization: A Complete Guide before working through the steps below.
Summary Box
- Walk through the apartment and identify the areas that create the most daily friction.
- Start with one drawer, surface, cabinet, shelf, or small zone you can realistically finish.
- Sort only the belongings in that selected area.
- Remove unwanted items and relocate things that belong somewhere else.
- Group related belongings and give them consistent storage locations.
- Put frequently used items where they are easiest to reach and return.
- Test the arrangement through normal use and adjust anything that feels inconvenient.
- Repeat the same process in the next manageable area instead of opening several projects at once.
Table of Contents
Before You Start: Prepare for a Manageable Organizing Session
Before you move anything, decide how much time and attention you can realistically give the project. A short session that ends with one completed area is more useful than a large project that leaves several rooms half-sorted.
Choose a session small enough to finish. That may mean one drawer after dinner, one shelf on a weekend morning, or one cluttered tabletop while you have uninterrupted time. If the area looks too large for the time available, reduce the scope before you begin.
Have only the basic temporary supplies you need. A few bags or boxes can be enough: one for items leaving the apartment, one container for items that belong elsewhere, and a small, designated surface for sorting. You do not need to buy organizing products before you know what will remain.
Keep walkways, doorways, and exits clear while you work. The U.S. Fire Administration’s home fire escape planning guidance also emphasizes keeping doors and windows clear so they can be used during an emergency. Avoid spreading belongings across the whole room or placing piles where you will have to step around them.
If you are trying to figure out how to organize a small space with lots of stuff, this containment rule matters even more. Do not empty the whole room at once. Work with an amount you can sort, relocate, and put away before the session ends.
How to Organize a Small Apartment Step by Step
The process below is designed to be repeated. Complete one small area, make sure it works, and then move to the next pressure point. That keeps the project manageable and gives you a consistent way to make decisions.
Step 1: Walk Through Your Apartment and Identify Problem Areas
Start by walking through the apartment without rearranging anything.
Notice the places that repeatedly slow you down or create extra work. A dining table may be covered with mail and work supplies. An entry surface may collect keys, receipts, and unrelated items. A cabinet may be so packed that you have to remove several things to reach what you need. Frequently used belongings may repeatedly end up on a chair because their assigned storage is inconvenient.
Your goal at this stage is diagnosis, not correction.
Make a short list of the areas that cause the most inconvenience. You do not need a complete inventory of every room. Focus on places that interfere with everyday activities, create repeated searching, or make it difficult to use a surface, drawer, or cabinet for its intended purpose.
This first pass helps you decide where your effort will have the greatest practical effect.
Step 2: Choose One Manageable Area to Organize First
Select one pressure point that is small enough to complete in your current session.
Good starting areas include one drawer, one cabinet, one shelf, one tabletop, one section of the entry, or one compact activity zone. The ideal choice causes noticeable daily frustration but is limited enough that you can finish it without creating several new piles.
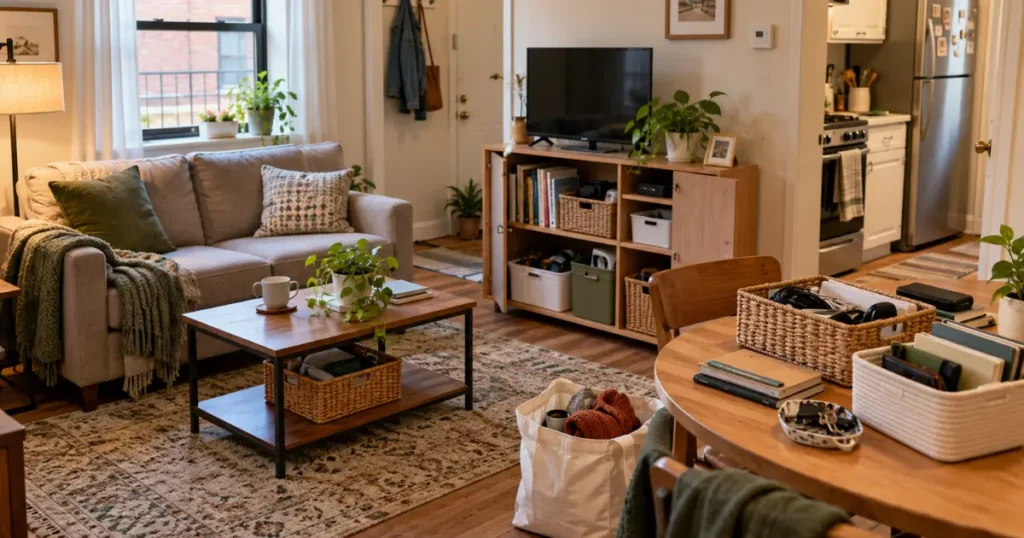
For example, instead of deciding to “organize the bedroom,” choose the top of one dresser. Instead of emptying the entire kitchen, start with the drawer that makes it difficult to find the utensils you use every day.
Completing one contained area gives you a functioning result immediately. Opening several areas at the same time does the opposite: it increases the number of loose belongings you have to manage before anything is finished.
Step 3: Sort the Belongings in That Area
Now work only with the belongings in the area you selected.
Separate them into a few practical groups:
- items that genuinely belong in this area,
- items that belong somewhere else,
- items you may no longer need,
- and items that require a decision before they can be put away.
Keep the categories simple. The purpose is to understand what the space is actually being asked to hold, not to create a complex sorting system.
Suppose you are organizing a small console near the entry. Keys and an everyday bag may belong there. A screwdriver may belong with household tools. Expired coupons may no longer need to stay at all. An unopened package that needs to be returned may need a temporary place until it leaves the apartment.
Handle the selected area only. This is not the time to expand into every related category elsewhere in the home.
Step 4: Remove Unwanted Items and Relocate Misplaced Belongings
Once the groups are clear, take action on anything that does not belong in the area.
Place unwanted items in the appropriate donation, recycling, or trash bag, and set aside anything that needs to be returned. Keep this task limited so the organizing session does not turn into a full decluttering project. The important point is to keep items that are leaving from drifting back into the apartment.
If excess belongings are making several areas difficult to use, consider completing a more focused decluttering project first. Our guide on how to declutter a small apartment explains how to sort unwanted possessions and remove them through manageable, contained sessions.
For usable belongings you no longer need, the U.S. Environmental Protection Agency offers practical guidance on reducing waste through reuse and donation.
Return obvious misplaced belongings to their proper areas. A bathroom item found on the entry console should go back to the bathroom. A kitchen utensil found in a living-room drawer should return to the kitchen rather than earning a permanent home simply because there is empty space.
Avoid creating many “deal with later” piles. If an item belongs in an area you plan to organize later, but putting it there now would create more clutter, place it in a single temporary holding box. Keep that container limited and visible so it does not become permanent storage.
By the end of this step, the selected area should contain only items that genuinely belong there or that still require a deliberate decision.
Step 5: Group Related Items and Assign Storage Locations
Now give the remaining belongings consistent homes.
Think about four things: where an item is used, who uses it, how often it is needed, and how much room the category reasonably requires.
Related items that support the same activity usually work better when they stay near one another. A small group of bills, envelopes, and a pen may belong together near the place where you handle household paperwork. Everyday keys may belong near the entrance rather than in a bedroom drawer simply because the drawer has space.
Do not overcomplicate the categories. If a handful of items serve the same routine, one clear location may be more useful than several tiny subcategories.
A logical storage home should answer two questions easily: “Where would I look for this?” and “Where would I naturally put it back?”
Step 6: Arrange Belongings for Convenient Everyday Access
After you know what belongs in the area, arrange it according to frequency of use.
Give the easiest-to-reach locations to the items you use most often. Less frequently used belongings can go on higher or lower shelves or farther back in cabinets, provided they remain safe and reasonably easy to retrieve. Keep heavier items on lower shelves.
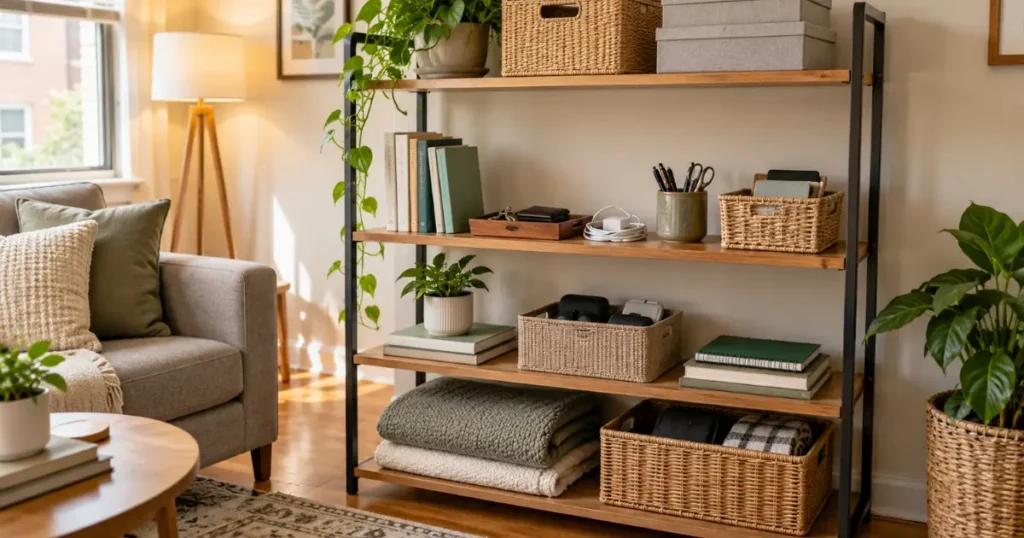
Use the drawers, cabinets, shelves, and furniture you already have before adding new organizers. A cabinet does not need to be packed to maximum capacity to be useful. Leaving a little room can make it easier to remove and replace belongings without disturbing the rest of the arrangement.
For example, if you use a notebook and charger every day, do not place them behind a box of seasonal items simply because everything technically fits. Put the daily items where you can retrieve and return them in one simple motion.
If a new organizer still seems necessary, identify the exact problem first. Measure the available width, depth, and height, and make sure the organizer would improve access rather than merely add another layer.
When your existing storage genuinely needs improvement, our small apartment storage ideas guide explores practical options such as vertical shelving, under-bed containers, multifunctional furniture, and renter-friendly solutions.
For more guidance on making limited storage easier to use throughout your home, see our How to Organize Small Spaces guide.
Step 7: Test the Arrangement and Make Adjustments
Do not assume the area is finished simply because it looks neat.
Use it normally. Open the drawer. Reach for the item. Put it back. Clear the surface. Repeat the routine that caused trouble before.
Ask:
- Can I reach what I need easily?
- Can I return it without moving other things first?
- Does one item block another?
- Is the category already too full?
- Has this arrangement created a new problem?
- Can the area still support the activity it is meant to serve?
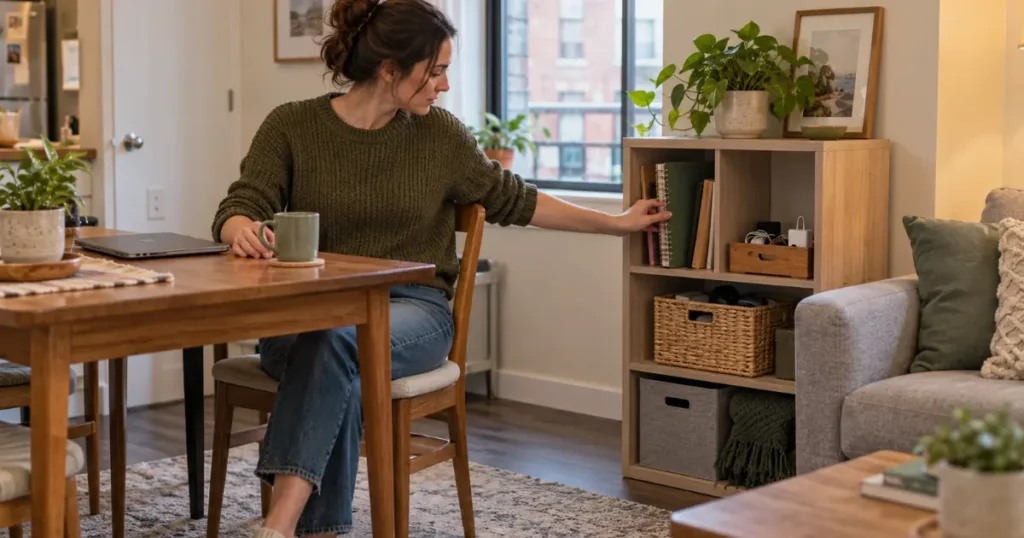
A system can look orderly and still be inconvenient. Imagine a group of daily charging cables stored inside a lidded box behind several books. The shelf may look tidy, but moving the books and opening the box every evening creates unnecessary work. Moving the cables to an accessible container may be less decorative but more functional.
Adjust the system before moving on. The goal is not visual perfection. The goal is a setup you can use without thinking too hard about it.
Step 8: Repeat the Process in the Next Apartment Area
Once the first area works, choose the next manageable pressure point and repeat the same sequence.
Try not to reopen completed areas unless you need to return an item there. This helps you keep visible progress and prevents the apartment from becoming one large active sorting project.
You might move from an entry surface to one kitchen drawer, then later to a bathroom cabinet or one shelf in the living area. The order does not have to follow the floor plan. Let repeated daily friction guide what comes next.
When you’re ready to tackle another area but need inspiration for a practical improvement, explore these small apartment organization ideas for entryways, shared spaces, cabinets, kitchens, bathrooms, and bedrooms.
There is no universal deadline for finishing the apartment. The useful rhythm is simple: identify one problem, complete one contained area, test it, and then move forward.
That repeatable structure is the practical core of how to organize a small apartment without overwhelming yourself.
If you need inspiration for tackling other compact areas, explore these 21 Small Space Organization Ideas and choose only the ideas that address a problem you’ve already identified.
Worked Example: Organizing a Cluttered Apartment Entryway
Consider a small rental apartment where a narrow entry surface has collected keys, mail, an everyday tote, a phone charger, a half-empty water bottle, a screwdriver, and two old receipts.
First, identify the friction. The keys are often hard to find, mail spreads across the surface, and the tote sometimes lands on the floor near the doorway. The entrance still functions, but leaving and returning home takes more searching and clearing than it should.
Next, limit the project to the entry surface and the small wall area immediately beside it. Do not open the nearby closet or start sorting every bag in the apartment.
Sort what is there. The keys, current mail, and frequently used tote genuinely support the entry routine. The phone charger belongs near the place where the phone is normally charged. The screwdriver belongs with household tools. The water bottle should be emptied and returned to the appropriate kitchen area. The old receipts can be handled according to whether they are still needed.
Remove or relocate those misplaced items immediately. If one item needs a decision later, place it in the single temporary holding location you established before the session.
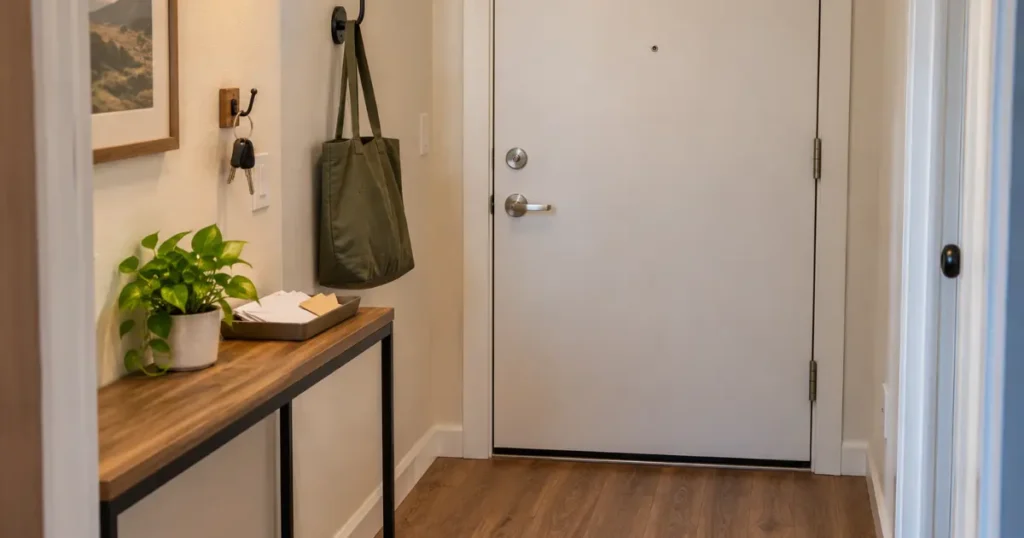
Now group the true entry essentials. The keys and current mail need a small, consistent landing place. The tote needs one reliable location that does not interfere with the door.
Assign homes using what is already available. An existing hook near the entrance can hold the keys, while a shallow tray on the entry surface can hold current mail. A separate suitable hook or another convenient location can hold the everyday tote without obstructing the doorway. No large entryway system is necessary.
Arrange the essentials so the most frequently used items are easiest to reach. Keep the door handle, swing path, and walking route clear.
Finally, test the setup for several normal arrivals and departures. If the tray starts filling with unrelated items, narrow its purpose. If the tote’s location gets in the way, move it. If mail is still spreading, decide where processed mail goes after it leaves the entry.
The result is not a redesigned entryway. It is a small area that now supports the routine it was already being asked to handle.
How to Keep Your Small Apartment Organized Afterward
The system you create only needs enough maintenance to keep working. You do not need to repeat the entire organizing project every day.
Daily Reset
Use a short, flexible reset to return obvious misplaced belongings to the homes you have already created.
That might mean returning keys to their usual spot near the entrance, putting away work supplies after use, returning a remote to its designated place, or moving an item back to the drawer where it belongs.
The reset should be simple. If returning belongings regularly takes a long time, that may signal that one or more storage locations are inconvenient.
Do not turn maintenance into a rigid schedule. The purpose is to restore function before small amounts of disorder begin interfering with daily use.
Occasional Review
Review an area when the system begins showing signs of strain.
A drawer may repeatedly overflow. Frequently used items may become buried behind newer belongings. A category may no longer fit its assigned location. Your routine may change, making the old storage location less useful.
Treat those signals as feedback.
For example, if a household starts working from home more often, a small work-supply category may need a more accessible home than it had before. Adjust the location rather than repeatedly forcing the old setup to work.
Maintenance is not only about putting things back. It is also about improving systems when everyday use shows you that they no longer fit.
Frequently Asked Questions
How can I organize a small apartment when I only have 20 minutes?
Choose one small area you can finish within that time, such as one drawer, a small section of a countertop, or one shelf. Sort only what is there, relocate obvious misplaced items, give the remaining belongings clear homes, and stop when that contained area is functional. Do not use 20 minutes to empty several areas at once.
Should I empty every drawer and closet before organizing?
Usually, no. Emptying several drawers or closets at once can create a larger mess than you can finish comfortably. Work with one contained area at a time unless a particular drawer or small closet is compact enough to complete in the same session.
When should I buy storage containers?
Buy a container only after you know what needs to be stored, where it should live, and how much space is available. First use existing drawers, shelves, cabinets, and suitable containers. If a specific category still needs containment, measure the location before choosing anything new.
How do I know when an area is organized enough to move on?
Move on when the necessary belongings have logical homes, frequently used items are reasonably accessible, misplaced items have been removed, the area can support its intended activity, and putting things back is straightforward. It does not need to look perfect.
Conclusion
Learning how to organize a small apartment becomes much more manageable when you stop treating the entire home as one project.
Start with one pressure point. Sort only what is there. Remove or relocate what does not belong, assign useful homes to what remains, arrange frequently used items for easy access, and test the result through normal daily use.
Then repeat the same sequence in the next manageable area.
Your next action is simple: walk through the apartment, choose one contained place that repeatedly causes friction, and complete that area before opening another organizing project.